Sunday, February 17, 2013

Cheesecake Squares

 
Ever wanted to bring something to a potluck that would stir up a craze, and leave them talking about it for months?!  This is the one recipe that will do that.  The crust tastes like shortbread, the cream cheese is super light, and the topping is sweet and delicious! You can change it up and add whatever fruit you'd like, but both the mango & guava are the best.  I'll show you two ways, one with fresh fruit and the other with just the juice.  I like more cream cheese than fruit, but if you like a lot of fruit on your cheesecake, double your cubed fruit measurements. 

SHORTBREAD CRUST

ingredients:
2 cups all-purpose flour
3 tablespoons sugar
1/2 teaspoon salt
1/2 cup butter (cold; cut into cubes)
1/2 vanilla bean

method:
It is important that your butter is cold, so don't bring it out of the refrigerator until you are ready. 


Put flour, sugar, salt, and butter into the bowl of a stand mixer.  Run the blade of a knife along your vanilla bean and scrape out as many vanilla seeds as possible (reserve seed pod).  Scrape it off into your bowl, or onto your paddle attachment.  Beat together until flour is just combined.  Chunky flecks of butter is what you want to see.  A smooth dough means it has been overbeaten. 

 
Press dough into a greased 9x13" pan, and dock it using the tines of a fork.  This will help to prevent your dough from puffing up too much.  Store in the freezer for 10-15 minutes, or refrigerator for half an hour.  Preheat your oven to 400 degrees.  Place pan directly from the freezer to the oven.  Bake for 18-20 minutes, or until the edges have browned nicely.  Cool completely on a rack, then return to the freezer or refrigerator to get cold.
 

 CREAM CHEESE FILLING

ingredients:
16 oz. cream cheese
1/3 cup granulated sugar
1/2 vanilla bean
8 oz. Cool Whip or other brand whipped topping (do not use whipped cream)

method:


Beat cream cheese in a stand mixer until fluffy.  Add sugar and the seeds of the vanilla bean (reserve seed pod), and beat again until smooth.  Remove bowl from mixer and fold in entire tub of Cool Whip by hand.  Spread over cold crust, and refrigerate until ready to use. 

MANGO TOPPING (fresh fruit topping)

ingredients:
1 cup water
1 envelope Knoxx unflavored gelatin
1/2 cup sugar
1 tablespoon lemon juice
reserved vanilla pods
4-6 cups cubed mango (cold)

method:
Measure out 1/2 cup of cold water, and sprinkle gelatin slowly over entire surface, being sure not to pour it into a clump.  DO NOT MIX, allow the gelatin to slowly dissolve into the water.  Heat up the other 1/2 cup of water along with the sugar, lemon juice, and vanilla pods until the sugar dissolves.  Strain and pour hot mixture in with the gelatin, and allow to sit until the gelatin has dissolved completely. 


Pour gelatin mixture over cold mango, and mix gently. Allow to sit for 10 minutes.


 Spoon mango over cheesecake with a slotted spoon and spread over entire surface.  If you want to add the juice to fill in the spaces, you can.  It will gelatinize in the refrigerator.  Place in the refrigerator for 2 hours before serving.  Cut into squares.   

GUAVA TOPPING (fruit juice topping)

ingredients:
2 cups guava juice or nectar
1/2 cup sugar
1/4 cup cornstarch
1/4 teaspoon LorAnn guava flavoring (optional)
1 drop Electric/Neon Pink food gel
reserved vanilla pods

method:
 
In a heavy-bottomed pot, heat up all ingredients together on medium high heat.  Stir constantly until it has thickened into a hot pink gel.  Pour onto a flat plate, cover with plastic wrap, and refrigerate for 1 hour or until completely chilled. 


Whip up guava gel to loosen the consistency, and spread over cheesecake.  Refrigerate again for 2 hours to reset before serving.  Cut into squares.


Wednesday, January 2, 2013

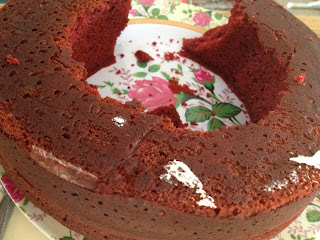
Red Velvet Trifle

Happy New Year!  For last night's New Year celebration, I decided on a trifle.  Trifles are usually my go-to dessert.  They're very easy to make, and always light and delicious.  Some of the earliest trifles were usually made of various layers of cakes soaked in flavored gelatin, fruit, firm custard, and whipped cream.  My trifles are different since I don't care for gelatin much.  They are usually just layers of cake, pudding, fruit, and whipped cream.

 
This time, I decided to make a chocolate trifle.  The layers were boxed red velvet cake, instant Jell-O chocolate fudge pudding, crushed Heath bar (milk chocolate coated English toffee), and whipped topping.  You must think it absurd that I cheated for this dessert, but that's why it is so easy!  If you'd like to make everything from scratch, you could.  I, however, still think that whipped topping holds better than homemade whipped cream.  It deflates after a couple hours, where whipped topping will last for days.  If you are planning on serving this immediately after it's made, then I say go ahead with the homemade (I confess it does taste much better, and is probably better for you considering whipped topping is made of oil).  If using whipped topping, be sure to purchase it at least 5 hours ahead of assembling.  Frozen whipped topping is a pain to work with, and you can't just whip it up to defrost it.  It must sit in the refrigerator for 5 hours to defrost correctly.  There is no other way.  Leaving it out on the counter will deflate it and cause it to turn back into cream.  Good luck!

RED VELVET TRIFLE

ingredients:
1 boxed red velvet cake mix (or milk chocolate cake mix dyed with red food gel)
4 eggs
1/4 cup vegetable oil
1 cup milk
1/2 cup butter (melted)
1 box Jell-O instant chocolate fudge pudding
2 cups half-and-half
3 Heath candy bars (crushed)
1 container whipped topping (do not get canned whipped cream, it will deflate immediately)

method:
Preheat oven to 350 degrees.  Combine cake mix, eggs, oil, milk, and butter in a large bowl and whisk until blended.  You may use a hand mixer if you'd like, but whisking is not too hard, and cleanup is a cinch.  Pour into a greased 9" round cake pan (or 9x13), and bake for 35 minutes or until a tester comes out clean.  Allow to cool completely before assembling.  Combine pudding and half-and-half in a bowl, and whisk until it starts to thicken.  Place in the refrigerator to firm up, until ready to assemble.

For homemade whipped cream:
1 cup heavy whipping cream
1 teaspoon vanilla
2 tablespoons granulated sugar

Beat cream and vanilla with a stand or hand mixer until soft peaks form.  Sprinkle sugar over the top and beat again until fluffy.  Do not overbeat, or your cream will turn into butter.

 
To assemble, cut cake to fit in serving bowl.  I used a clear pyrex bowl, so I ended up cutting out a smaller circle.  The bowl was quite shallow as well, so one round was enough for the entire trifle.  Use the rest of the cake for another trifle.  If you don't mind having chunks of cake instead of layers, just tear the cake up.  Now start layering the rest of your ingredients.

 
I started with the cake, topped it with half the chocolate pudding, then a layer of whipped topping, sprinkled on half of the crushed Heath bar, another layer of cake, the rest of the pudding, the rest of the Heath bar (reserved a few crumbs for the top), then the rest of the whipped topping.  For the topping, I sprinkled the rest of the Heath bar in the middle.  I then set my trifle in the sink, and sprinkled red velvet cake crumbs on the sides.  It was simple to lift the trifle out and wash the excess crumbs down the drain.  Refrigerate to allow cake to become the same temperature as the pudding and cream, and serve.  This was a hit at the New Year's party! 

Friday, December 28, 2012

Christmas Pudding

For our Olde English Christmas Feast, I was in charge of more than just the goose.  I wasn't really "in charge," I kind of volunteered to make everything.  Everyone was asked to bring a dish from a list, but the really important things that made an English Christmas Feast complete, weren't taken!  I was told an English Feast isn't complete without Goose, Yorkshire Pudding, Christmas Pudding, and Christmas Crackers... so I volunteered to do them all! 

videojug.com
So what is Christmas Pudding you ask?  It's not a creamy pudding like you may be thinking; it's actually a steamed fruit cake.  Don't be turned off just because I said "fruit cake."  Pudding tastes so much better than fruit cake!  Traditionally, the pudding was made the Sunday after Advent, and everyone in the household took a turn stirring the batter and making a wish.  The batter was filled with fruit and spices, and trinkets such as wishbones (to bring good luck), thimbles (thrift), sixpence coins (wealth), and anchors (safe harbour) which would be kept by the person who was served it.  It was then steamed for a really long time, and set in a cool place until Christmas. 

If you're an American, and your job for Christmas is to make a Christmas Pudding, all I have to say to you is "GOOD LUCK!"  It took me a month (on top of trying to find and learn how to cook a goose) to try to find a good recipe.  First of all, every recipe uses the metric system, so they must be converted.  Second, the damn nightmare takes about 7 hours to cook.  Lastly, every recipe calls for suet.  Do not get it mixed up with the suet they use for bird food.  That is loaded with preservatives and chemicals, not to mention the bird seed.  Suet is the fat that is found around the kidneys of a cow.  You're probably sticking your tongue out or making a face right now, but English people have always used this fat in pastry-making and deep frying.  It's almost impossible to find here in America, but totally IMPOSSIBLE here in Hawaii.  I've tried Whole Foods, local super markets (some butchers haven't even heard of the stuff), even Chinatown!  It's mostly sold in England by a company called Atora (which comes in dehydrated flakes).  It can be pre-ordered through Amazon, or any British import company, but I didn't have the time.  Be sure to order early though, to beat the Christmas postal delays.   I ended up using butter in my recipe.  I froze it first, then grated it to represent the suet flakes.  Every website told me not to use butter, and that suet was IMPORTANT, but I didn't listen and my pudding came out delicious!

I ended up settling on a recipe I found on You Tube by VideoJug, replaced the suet with butter, and added a few ingredients of my own.  I made it a week ahead of time, and good thing I did!  Once it was completely done it tasted horrible!  By the time it was served, however, the flavors had settled and mellowed out, and it was the most delicious dessert I had ever eaten at Christmas!  If you're wondering what Christmas would taste like if it were a flavor, it would definitely be Christmas Pudding!

CHRISTMAS PUDDING
serves many, many people!

ingredients:
1 10 oz. box dried zante currants
1 15 oz. box raisins
1 15 oz. box golden raisins
1 pound breadcrumbs
4 tablespoons flour
1 pound dark brown sugar
1 teaspoon dried lemon peel
1 teaspoon dried orange peel
15-20 maraschino cherries (chopped)
1/4 cup chopped almonds (no skins)
zest of 1 lemon
zest of 1 orange
1 apple (grated)
1 teaspoon pumpkin pie spice
1/2 teaspoon salt
1 cup butter (freeze, then grate.  store in freezer until ready to use)
6 eggs
1 11.2 oz bottle of Guinness
1/2 cup brandy

method:
Combine all ingredients in an extremely large bowl except the butter, eggs, Guinness, and brandy.  Be sure to keep your grated butter in the freezer until you're ready to use it.  Beat your eggs, and add it along with your frozen butter, Guinness, and 1/4 cup of the brandy to the mixture.  Stir it up well, but not enough for the butter to soften and smooth into the batter.  Butter a heat-proof glass bowl, and fill with your mixture.  Press firmly into the bowl making sure there are no air bubbles along the sides.  Cut a round of parchment paper to fit the top of the bowl, and seal tightly with foil.  Using baker's twine, or some strong string, wrap your bowl as if it were a present.  This will create a "handle" for you to pull out your pudding once it's done.  Place bowl into a pot or skillet large enough to fill with water 3/4 up the bowl.  Fill with water, and place on high heat until it starts to boil.  Once it starts to boil, turn the heat down to a slow boil and let boil for 7 hours.  Keep another pot on the stove filled with water (on a medium-low heat), to refill pot whenever the water evaporates.  If this can't be done, refill the pot with water, turn back on high to bring to a boil, and back down to a low boil or simmer.  Once it's done, remove from the pot.  Remove foil and parchment, poke holes all over the top and slowly pour over the rest of the brandy. 

 
Cut a new round of parchment paper, and reseal with cling wrap and foil.  Wrap pudding tightly, and store in a cool dark place until Christmas (this can be done up to 2 months before Christmas, but must be done at least one week prior to serving).  After wrapping in cling wrap and foil, I wrapped the entire bowl in newspaper a couple of times, and placed it in a plastic bag in the closet. 

Before serving, place bowl back in pot with water, and boil for 1 hour to heat all the way through.  You can try to microwave the pudding at 30 second intervals.  Unmold onto a pretty plate, douse in brandy and light it on fire for a spectacle!  It tastes delicious served warm with vanilla bean ice cream.  The cream cuts the spices and fruit, and tastes wonderful together!  The better the ice cream, the better the pudding!!  Enjoy.

Monday, December 24, 2012

Roast Goose with Gravy

So yesterday I made my first goose.  Actually, when I was about 11 years old, my dad and I made our first goose.  The smell in the house was horrible, and we ended up giving the meat to the dogs.  We didn't have an oven, so the goose was boiled on the stove.  I just remember the pot boiling furiously, and having to skim off the abundance of oil from the top. 


Yesterday we had an Olde English themed Christmas party.  We dressed up in Englishwear, and brought many dishes like Yorkshire Pudding, Kilted Sausages, Roast, real Port Canberry Sauce, Brussel Sprouts, Christmas Pudding, English Trifles, Mincemeat Pie, and of course this Roasted Goose.  Everything was really delicious, especially the Founder's Reserve Porto (Port Wine) and Madeira wine I was drinking!!  However, the goose was quite a hit (mostly because it was a different type of meat no one was really used to).


Finding the goose was a pain.  Here in America, goose is not very popular.  So good luck trying to find it if it's not the holiday season.  I started my goose hunt early last month .  I called every poultry, meat, butcher on the island and no one had it.  Much to my suprise though, Safeway of all places had it!  I didn't know if it was going to run out by Christmas, so I immediately picked one out and bought it.  Oh!  By the way, plan on spending $80 for your 10 lb goose (ridiculously expensive, but I was desperate).   Luckily, Safeway was having a Thanksgiving sale and my goose got $20 knocked off with my Safeway card!  When December rolled around, I found out a 10 lb goose would only feed 4-6 people, so I went back to Safeway to get myself another goose.  Good thing I walked in during the Christmas sale and got the same price. 

I spent 2 months trying to find out how to roast the goose, watching YouTube videos, checking out blogs, and getting seriously annoyed that almost every recipe used the metric system!  But alas I had found a wonderful recipe over at Simply Recipes, and combined it with Martha Stewart's recipe to create my own.  I hope you enjoy.


ROAST GOOSE w/ GRAVY
(serves 4-6)

ingredients:
1 10 lb goose
1 apple
2 large yellow onions
10 sprigs of fresh sage
1 head of garlic
salt
pepper
3 tablespoons flour
1/2 cup Madeira wine
(took me forever to find this wine!  Located in the section with Port, most likely by the Sakes)
2 cups chicken stock
1 teaspoon thyme

 
Geese usually come frozen.  To prevent any type of contamination or food poisoning, the best way to defrost is to do it in the refrigerator for a couple days.  If you don't have a few days, find a container large enough to hold your goose, place it in, and fill with water.  Every 30 minutes the water needs to be changed, and this must be done for 6 hours.  Leaving your bird out on the counter is the worse way to thaw your bird.  The temperature on the outside of the bird will thaw faster than the cavity, allowing bacteria to multiply rapidly over the skin.   
 
method:
Preheat your oven to 400 degrees F.  Prepare your goose by unlooping the legs then removing neck and giblets from the cavity.  Peel off all large chunks of fat at the opening and reserve to render out.  Break off wing tips by cutting around the joint, and snapping off. Trim the neck skin, and reserve with the fat.  Completely rinse bird with hot water (only if goose is still cold, otherwise use cool water).  Pat dry with lots of paper towels, and inspect/remove all pin feathers.  Prick the skin of the goose with the tip of a sharp knife (being careful not to pierce the meat).  This will help the fat to drain out of the bird, but keep the juices in. 
 
 
Next, season the entire bird with salt and pepper.  Use more salt than you think, this will help crisp the skin as well as give a nice flavor to the bird.  Don't forget to season the inside of the cavity.  Turn the bird over, and using 2 toothpicks pin down the neck flap flat against the back.  If you'd like to use other seasonings such as dried rosemary, sage, or thyme you can use that to season the bird as well.  I just wanted a slight perfume of seasoning, so I used fresh sage on the inside of the cavity.  You will find that the salt will start to draw out some of the juices, and your bird will no longer be dry.
 
 
Cut one onion and apple in half, and peel all cloves of garlic.  Stuff it inside the goose cavity along with sage sprigs.  Pull the cavity flaps together to close, and squeeze the legs together to help keep them shut.  Tie the legs back together with the loop of skin, and try to double it to keep it tight.  Using pieces of foil, wrap the tips of the wings to prevent them from burning. 
 
 
Place in a roasting pan filled with 2 cups of water fitted with a rack, and place in the hot oven.  Bake for 50 minutes, then turn the heat down to 325 degrees, and bake for 1-1.5 hours or until a meat thermometer registers 170 in the thickest part of the thigh (not touching the bone).  Using a turkey baster, remove oil from pan throughout the cooking process, and replenish with boiling water.  Goose is safe to eat medium rare to slightly pink.  Once well-done the meat becomes chewy and livery tasting. 
 
 
During roasting, start gravy.  In a large heavy skillet or pot, brown the goose neck, wing tips, and giblets in some goose fat (discard liver, or cook seperately and add to gravy later - this will make your gravy bitter if cooked together).  Chop or grate your onion, and throw it into the pot.  Add more goose fat if your pot has become too dry.  Once the onions have started to become transluscent, add the flour and cook for 3-4 minutes or until the smell has become toasty.  Turn the heat up to high, and add the Madeira wine.  Allow to boil for a minute or so while scraping the bottom of the pot, to loosen any stuck on bits.  Add chicken stock and bring the gravy down to a low simmer.  Add dried thyme, and a few chopped sage leaves if you desire.  Skim off any oil that raises to the top.  Keep simmering until the gravy has reduced. 
 
 
Once your goose is done, allow it to rest for 20 minutes.  Remove wing foil, onion, apple, sage, and garlic from cavity.  Chop up garlic and place into gravy pot. Remove neck and wing tips, and pick off any meat and throw back into pot.  Pour gravy into a blender and blitz it until smooth, or strain it through a sieve.  Pour into a gravy boat, or keep it warm on low heat. Place goose on a serving plate, or carve and serve up warm with gravy. 

With the reserved fat and neck skin, place in a small sauce pan and place on low heat.  Using a turkey baster, siphon out juices and place in a glass jar.  Once fat has been completely rendered, use baster to siphon out just the fat into a glass jar.  Do the same with the roasting juices, and you'll have a large jar full of "liquid gold" as they call it.  Goose fat is wonderful for frying, roasting potatoes, and keeping meat moist while roasting. 

Monday, May 28, 2012

Lamb & Beef Stew in Wine Sauce

My passion for cooking started at a young age.  I remember the first thing I ever cooked - scrambled eggs.  My mom taught me how to make it.  I would always watch her and my grandma in the kitchen.  Back then I wasn't interested in learning techniques and how to create flavors (darnit I wish I did), I was just interested in the final product! 

My grandma was the best Hawaiian Beef Stew maker in the world.  It always came out perfect.  Although I'll always crave that woman's stew, this one is by far my favorite now!  It's wonderful served with bread and butter, atop a scoop of white rice, or twice baked with a garlic mashed potato topping (Shepherd's Pie) - the latter being the way I serve it now.


LAMB & BEEF STEW
serves up to 6 people

ingredients:
2 lb lamb shoulder
2 lb chuck spare rib
bacon fat (or vegetable oil)
2 cans beef stock
10 peppercorns
1 large carrot (chopped)
1 small onion (chopped)
3 ribs celery (chopped)
1 bay leaf
4 cloves garlic (minced; I grate it, it's so simple)
large pinch salt
1 teaspoon coarse black pepper
1/2 bottle red wine (I used Pinot Noir for this recipe)
1 teaspoon thyme
1 teaspoon oregano
1 teaspoon parsley
1 container mushrooms (sliced)
4 tablespoons butter (do not replace with butter spread or margarine)
2 tablespoons vegetable oil
3 tablespoons cornstarch (optional)


method:
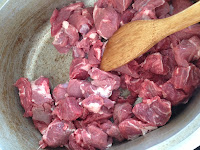
De-bone your lamb and beef, then cut into cubes.  Dry off meat using a clean towel or napkins.  This will allow to your meat to actually brown, and not steam.  If you notice your meat is a bit grayish, and a lot of liquid accumulates at the bottom of the pot, it's because it wasn't dried properly.  Brown in an oven-proof pot using bacon fat(or oil) on high heat. 


Heat beef stock over medium high heat along with all the bones from the meat.  Add the peppercorns, and a few chopped vegetables (carrot, onion, & celery).  This will help flavor the stock.  Boil until you have about 2 cups of stock left. 


Add carrot, onion, celery, 2 cloves of garlic, and bay leaf.  Turn your heat down to medium-high, and keep stirring until the onions start to become translucent.  Add salt and pepper (adding this too early will draw the juices out of your meat, leaving it dry).  Pour wine into the pot, and scrape the bottom to loosen any stuck-on pieces of meat.  Once wine has come to a boil, remove your bones from your stock, and pour contents into your meat pot.  Allow to boil for about 10 minutes, stirring often to avoid the bottom from getting burnt. 


You can leave the bones if you'd like, or even strain it so the peppercorns and boiled vegetables don't make it in.  I like scraping the meat off at the end, and removing it before serving.  Plus, I enjoy the random peppercorn every couple of bites, and my friend's dog loves the bone once it's been completely cooked through.


Add thyme, oregano, and parsley, cover and place in a 350 degree oven for 2.5 hours.


In a frying pan or skillet, heat butter, oil, and remaining clove of garlic.  Once butter has stopped foaming, add mushrooms.  Cook until tender, and set aside (about 3-4 minutes).  If you were to use margarine or a butter spread, the mushrooms will give off a "plastic" taste.  Use real unsalted butter for this.  Save the fake stuff for your toast.  After 2.5 hours in the oven, taste gravy and adjust using water, wine, salt, or garlic.  If you want the stew to be thicker, dissolve the cornstarch into some water first. 


Add mushrooms to your stew, and continue in the oven for another 1/2 hour.  Serve on rice, or with bread.   

For Shepherd's Pie:

ingredients:
5 large potatoes (peeled)
2 tablespoons salt
2 cloves garlic(or one head garlic for Roasted Garlic)
1/2 cup butter
2 tablespoon garlic salt
pepper
1/4 cup heavy cream or 1/2 cup milk


method:
While stew is in the oven, chop potatoes into 1-2" cubes and place in a pot with water.  Add salt and bring pot to a boil.  Let boil for 10-12 minutes or until potatoes are nice and soft, and turn off heat.  Drain potatoes and put back into the pot on the stove. The heat from the hot (but cooling) burner will help to dry the potato off.  Mash with a fork until there are no large chunks of potato.  Grate garlic into potatoes and add butter. Using a hand mixer (or continue with fork like I did), blend the potatoes as fine as you can.  Stir in salt, pepper, and cream until you get the consistency and taste you desire.

For Roasted Garlic Mashed Potatoes:
Slice top third of garlic head off.  Saturate in oil, and wrap in foil.  Place in a 400 degree oven for 40 minutes.  Cloves should be soft and moist.  Squeeze entire head to release the cloves into potatoes. 

Once stew is done, strain into a baking dish (if you don't do this, the sauce will bubble up and drown your potatoes).  Using a pastry bag, pipe your potatoes on the stew, making sure to cover the entire surface (or you can spoon mounds of potato across surface).  Place back in the oven and bake for 30-40 minutes, or until the potatoes have browned nicely.